Last year we switched our food blog to ConvertKit and we couldn’t be more pleased with the results. The open rates and click rates have increased over what we saw with Sendgrid and we just love the easy to use email automation features of ConvertKit.
The following is our experience with ConvertKit and provides an overview of the migration and setup process. Below we include the steps needed to migrate your email list to ConvertKit. [Full disclosure: we are now affiliates for ConvertKit and offer consulting for others migrating to ConvertKit.]
Start your ConvertKit Free Trial.
Why We Switched to ConvertKit
As our food blog has grown, so has its email list, to over 20,000 subscribers. It has been difficult to engage with the list and to prepare and track email sequences. We now also offer weekly meal plans and eBooks to sell.
No subscriber wants to receive the same product pitch over and over or a pitch for a product they already purchased! We needed a solution to track email subscriber preferences and filter emails based on preferences and purchase history.
ConvertKit has all of the features we needed, a user-friendly interface and unlimited emails per months at a price similar to other competing email providers like MailChimp or Aweber.
Tracking Subscribers
ConvertKit’s primary method to track the preferences of your subscribers is through its powerful and easy to use tagging system.
Any link in any email you send through ConvertKit can have what ConvertKit calls a “link trigger” attached to it. The simplistic and most useful link trigger is one that tags a subscriber with a piece of information if they click on the link.
For example, if you have social share icons in the footer of your email for Pinterest and Instagram, you can add a link trigger for each. Now, when a subscriber clicks on either link, their profile in ConvertKit will be tagged with “Pinterest – Click” or “Instagram – Click” or similar. You can give each tag any descriptive name you like.
What can you do with ConvertKit tags?
- Include or exclude subscribers from each email you send based on assigned tags.
- Begin a subscriber on a new autoresponder sequence to sell a product specific to their tagged interests.
- Start an email challenge with only the subscribers who have expressed some prior relevant interest.
- Ensure you only run a subscriber through an email sequence once or if applicable multiple times.
- Hide a product discount from prior purchasers so they don’t know they paid more than the current discounted offer.
- Target prior purchasers with a special discount, or exclusive access to a new product.
- Offer a discount on a product only after your sales pitches at full price has failed to convert.
These are just a few ideas we have tried and tested. In short, ConvertKit tags allow you to make each email relevant to the segment of subscribers receiving it. This drives higher engagement for your blog, lowers unsubscribe and maximizes sales of your products.
Our Results with ConvertKit – Higher Open Rates and Click Rates
With ConvertKit the open rate on our blog’s welcome email increased by 65% and its click rate increased by 37%. A 37% increase in subscriber confirmations? Yes please!
Each auto-responder in the welcome sequence has also seen an increase in opens and clicks.
Broadcasts of new post content have similarly seen a 40%-50% increase in open rates versus our previous system.
Increasing eBook Sales with ConvertKit
ConvertKit’s email automation has also increased sales of our sites eBooks. The eBooks are sold through Gumroad which integrates with ConvertKit. The integration automatically tags purchasers of each product. When a subscriber is tagged as having purchased of a product in ConvertKit you can then specifically include or exclude that subscriber from any future email, sequence or automation.
For example, you can exclude a purchaser of a specific eBook from a new email sequence pitching that eBook. Moreover, if your sales sequence has multiple emails you can set up the sequence so that as soon as a subscriber purchases the eBook they are opted out of the remainder of the sales sequence!
You can also easily start a new product purchaser on an email sequence to keep them engaged with your product, request their feedback or just to say thank you. You might ask just your product purchasers to test a new product or grant them a special VIP offer. ConvertKit’s powerful tagging system will help you to sell more eBooks.
Switching To ConvertKit
ConvertKit is an up and coming alternative to MailChimp, Aweber, Mailerlite and similar competitors. ConvertKit has fewer email templates and limited A/B testing compared to MailChimp. ConvertKit itself has said if you are just after beautiful emails, stick with MailChimp. Here is a comparison of Convertkit with MailChimp and other providers.
Where ConvertKit really shines is the strength of its automation and its user-interface to edit and create automated marketing sequences. ConvertKit enables all kinds of bloggers to automate their marketing and engage their email list. ConvertKit is right for you if you have eBooks, meal plans or other digital products to sell or if you want to engage your list on a regular basis, targeting your subscribers with topics most relevant to their interests.
Targeting your subscribers with multiple email sequences does take time and effort but, the reward is a loyal list that engages with the content on your site and on social media. An engaged email list is also an important source of traffic that you control, that isn’t subject to the algorithm changes of Google or Pinterest.
We have always had a good experience with ConvertKit’s customer support. Their support can be overwhelmed at times because they are growing so fast but, our persist requests have always been met with a response.
Note: As a spam precaution, if you import a large email list you may not be able to send to that list with ConvertKit until your account is unlocked by their customer support. ConvertKit is careful to ensure that everyone on their system has great deliverability. They will ask you for a screenshot of your historical open rates/click rates and unsubscribe rates/spam complaint rates.
ConvertKit Setup Guide – The Steps from Sign-Up to Importing your Email List.
- First create an account at ConvertKit.com so you can follow along. (We offer ConvertKit consulting. After signing up with our CK link above, contact us and we can handle all the steps below for you.)
- Next you need to generate a clean subscriber list from your current provider to import into ConvertKit.An ideal list would be one where you have the first name of each subscriber with correct capitalization in addition to their email. I recommend you export your list into Microsoft Excel or Google Sheets and use functions to correct any of the inconsistencies that you can.
For example, both Excel and Google Sheets have a string function named PROPER() which will fix most capitalization issues.ConvertKit also supports arbitrary custom fields. If you have additional data like Country, date of birth, or subscriber preferences at your current provider, you can import that into ConvertKit too!If you have custom data you will need to plan the import carefully, and we would be happy to consult with you on your import. Just contact us.
- Once your list is ready, don’t import just yet! First create a tag so you will be able to track your imported subscribers.
Since we had no other subscribers in ConvertKit, we just tagged our imported subscribers with a “Imported Subscriber” tag. You could also add a date to your import tag. If you plan to use ConvertKit with multiple websites, you should make a unique tag with the name of each site. Inside ConvertKit go to Subscribers, then click “+ Create a tag” in the sidebar. Give your tag a name.
- You are now ready to import your subscribers.
Go ahead and follow ConvertKit’s directions for importing your subscribers.You will receive an email when your list finishes importing. Read that email carefully. It may ask you to provide information about the health and source of your list to customer support before you are able to send any emails.If you forget a data field in your import and want to add it later, it’s easy. ConvertKit will not create duplicate subscribers for the same email address. Just import the email addresses again and choose or create a new tag. ConvertKit will add the chosen tag to each subscriber on your list included in the import.We use this feature to tag the prior purchasers of each eBook. (The Gumroad integration only tags purchases made after activation of the integration).
You can do the same by downloading the purchase list for each product from Gumroad or the system you use to sell your products.Next, import that list with a tag that includes your desired description such as the name of the eBook or product purchased.Tip: If you import the subscriber name fields for a subscriber that is already in ConvertKit it will overwrite the current name in your ConvertKit list. You might want to do this, it will depend on which list has better name data. For example, our list of product purchasers had a complete name so we purposely overwrote existing form collected names for our product purchasers. If you don’t want to overwrite the name field, only import the email address. Again, if you need to merge data from multiple sources, the data can be manipulated with string functions in Google Sheets or Microsoft Excel. - You’re done, importing! Time to install the WordPress Plugin and configure your first email capture form!
Installing the ConvertKit Plugin in WordPress
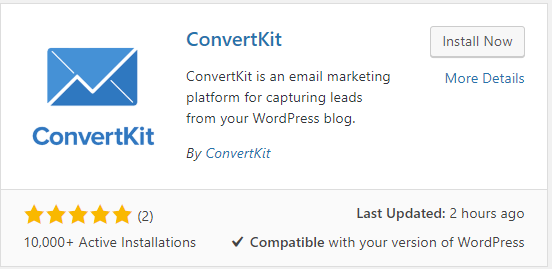
The ConvertKit Plugin is the easiest way to use ConvertKit with your WordPress site to collect email addresses. The plugin is in the WordPress repository so all you have to do is add the plugin in the usual manner.
In your WordPress Dashboard go to Plugins and then choose Add New. Search for ConvertKit and it should be the first result. Make sure you choose the Plugin “By ConvertKit” if you aren’t sure so you know you have the right one.
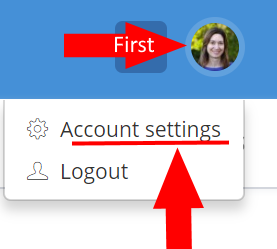
Install and activate the plugin. Now, go to your ConvertKit Account and click the Account link which is at the top on the far right. It may be a picture of you if you have set a gravatar.
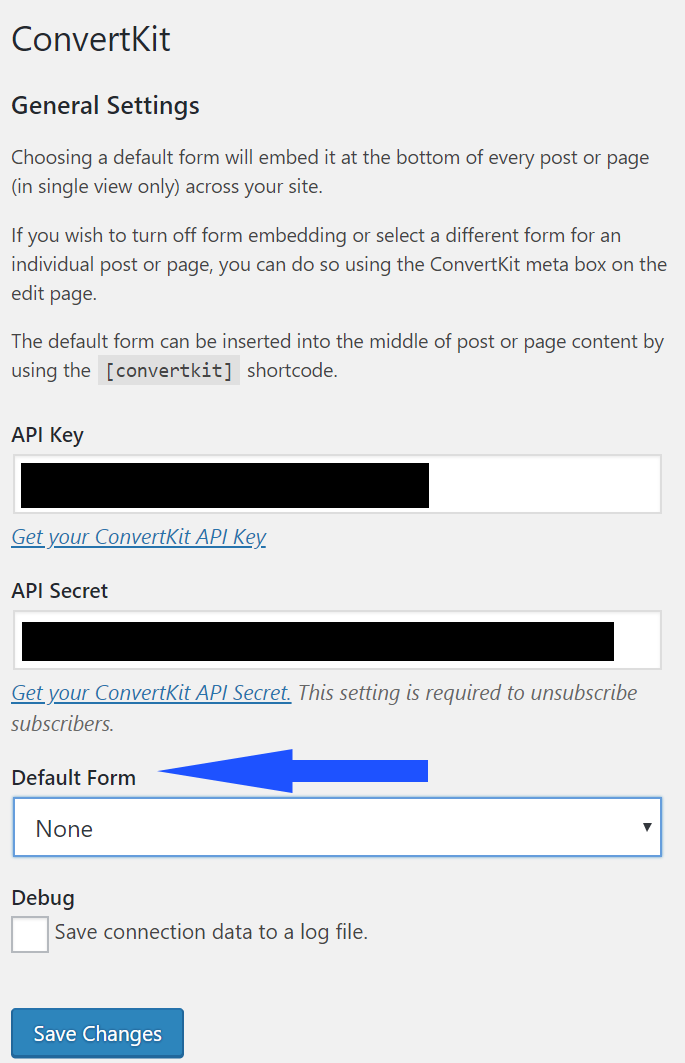
On the Account Info page you will see an API key and link to generate or show an API secret. Open another tab in your web browser and go to the settings page for the ConvertKit plugin in your WordPress Dashboard and paste both the API key and API secret into the fields to connect. Click the Save Changes button. Your site is now connected to ConvertKit!
Enabling GDPR Compliance In ConvertKit
While you have the ConvertKit account settings page open in your browser lets go ahead and turn on the GDPR Compliance settings. On the same Account page where you obtained the API key, look farther down the page and you will see a GDPR compliance settings.
Decide who you want to show subscriber consent options to “Show to all subscribers after they opt-in” or “Subscribers currently in the EU (determined by IP address)”. Since we are outside the EU and most traffic is non-EU, we chose to only show consent to “Subscribers currently in the EU (determined by IP address)”.
It is a good idea to also update your Privacy Policy to let users know you use ConvertKit to manage your email list. You might say something like this in your Privacy Policy:
Mailing List
If you sign-up for our emails / newsletters, your name, email address, IP address and other preferences will be stored at our mailing list provider and may be used to customize emails and information you receive from us. Our mailing list is managed by ConvertKit. You can view ConvertKit’s privacy policy here: https://convertkit.com/privacy/
You can unsubscribe from our mailing list at any time by using the unsubscribe link at the bottom of each email. You can also contact us as described below to request removal from our lists and deletion of any data associated with your subscription.
Now let’s get back to setting up ConvertKit to capture email addresses.
Setting a Default Sending Address
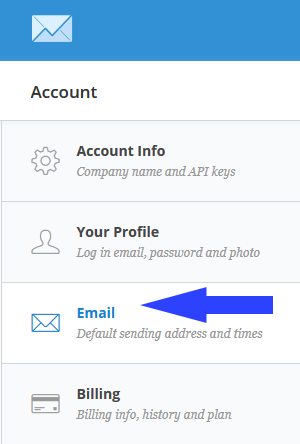
One more important setting! Also in Account Settings choose Email from the menu. On the Email Settings screen choose “Add From Address”.
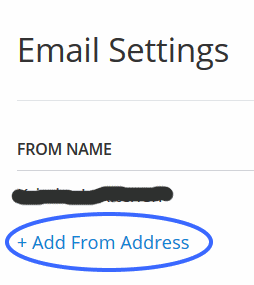
This email address will appear as the sending and reply address for any emails you send through ConvertKit. By default, your ConvertKit emails will come from ConvertKit’s sending domains, similar to how MailChimp emails appear in GMail “via mail180.sea101.rsgsv.net”.
You can change this default and make emails appear from your own custom domain by contacting ConvertKit’s customer support to enable a custom sending domain. You will need access to the DNS records for your domain to add new records.
The Steps for Creating ConvertKit Forms On Your Site
ConvertKit subscription forms are based on the html <form> tag as well as javascript. If you don’t already have a form or do not want to use your current form, I recommend you download and install ConvertKit’s WordPress Plugin if you haven’t already followed the instructions above.
The simplest way to install a form is to use the ConvertKit plugin. With ConverKit you can either create a form to embed on your site or have ConvertKit host a landing page to capture visitor’s email addresses.
Creating an Embedded Form to Capture Email Addresses
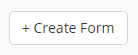
- First, login to your ConvertKit account. Choose Forms on the top menu and then the “Create Form” button. The Create Form button is located below the subscriber bar graph and to the right of the page. It looks like this:
You will be presented with the option of a Landing Page or a Form, choose Form. Choose a form style and then click on any text in the form to edit it. Click the Save button when done.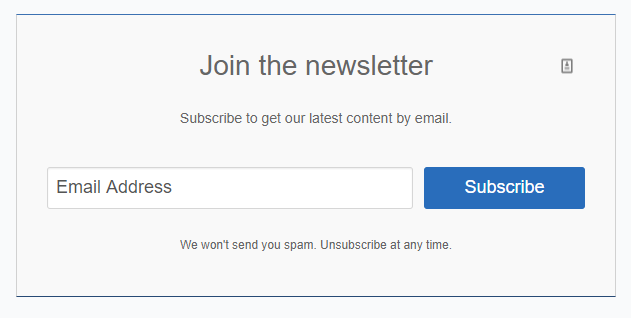
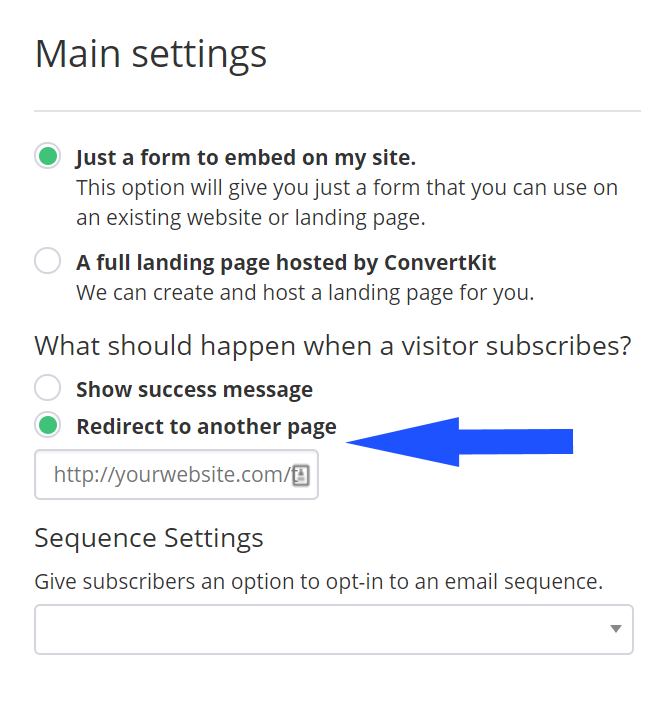
- By default, ConvertKit will show an inline success message and send a double opt-in email. When a user confirms from the opt-in email they will then be added as a subscriber and directed to a default ConvertKit page acknowledging their subscription. Neither of these defaults are optimal, so let’s change them.
Instead of the default success message, you should make a new Page in WordPress that thanks your subscribers for subscribing and directs them to their email client to confirm their subscription.To set this up create your thank you page in WordPress.What should you include on your subscription thank you page? In addition to thanking your subscribers, you should remind them to go to their email account to confirm their subscription by clicking the button in the confirmation email. If you promised your subscribers an incentive or lead magnet for signing up, don’t include it on the thank you page because you want them to confirm first. If you don’t have an email lead magnet here is an exhaustive list of ideas for your email lead magnet.
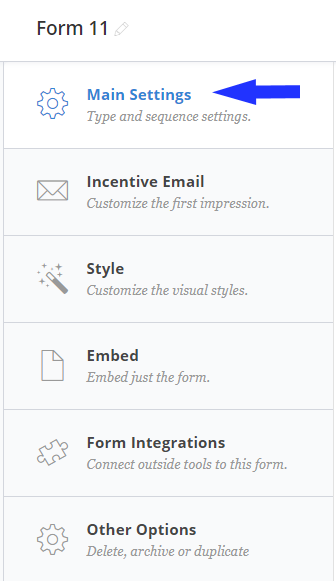
- After you have created and published your thank you page, head back to your ConvertKit Account and to your newly created form.In your new form, under Settings, then “Main Settings”, choose the option to “Redirect to another page”. Paste the full URL (including http:// or https://) of your thank you page into the redirect box. Now your subscribers will land on your thank you page after filling out your email subscription form instead of ConvertKit’s default page.
- If you promised your subscribers an incentive for signing up (You did right?!?) then let’s set that up.On the Settings page for your new Form under “Incentive Email”, customize the URL to lead to a WordPress Page that provides your incentive for download. Alternatively, if you want ConvertKit to provide the subscriber with the incentive, choose “Incentive Download” and upload the incentive to ConvertKit.
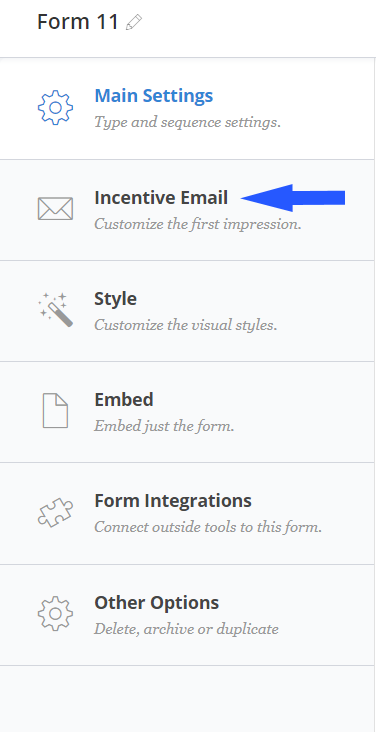
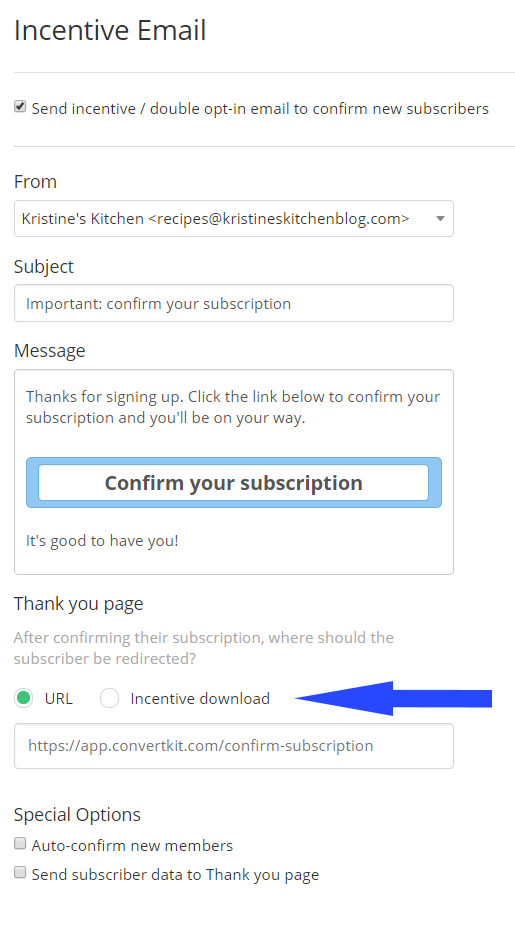
I think a page on your site with the incentive is preferable because that gets the subscriber to your site again which gives you a pageview and another chance to embed your visual branding in their mind. - While you’re on the Settings Page again for your Form, this is a good time to change the body of your email and the confirmation button text in ConvertKit’s default confirmation email. I think the defaults are fine but change them if you like.
- It is finally time to save your Form! By default, it has probably been named Form 1 or Form 2. You can change the Form name by opening it back up and clicking on the pencil icon to edit the Form’s name.

Use a descriptive name. If you plan on having more than one form on your site you might include in the name some description of its location like, “About Page Form”, “Homepage Form”, “Widget Form”, “Posts Form”. This allows you track the conversion rate of each form and later customize each one. - Finally to make the Form appear on your site go to the ConvertKit Plugin settings in your WordPress Dashboard. (Hint: it’s under the Settings Menu item on your WordPress Dashboard). Select your new Form by name. Save Changes. It will now appear at bottom of each post on your site!
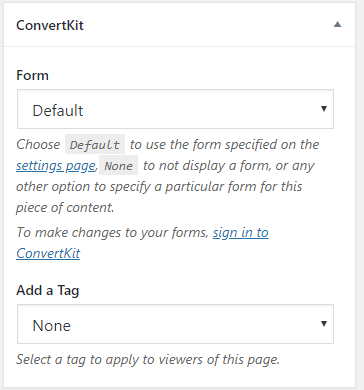
With the ConvertKit Plugin installed there is a new metabox below where you edit each Post and Page. Here you can choose a custom form to appear on a particular Post or Page. You can also use the shortcode [convertkit] to embed the form you have set as the default any place in a Post or Page. This is one way to have multiple forms. You will also see the “Add a Tag” drop down.
Setting a tag in the ConvertKit metabox for your post will add that tag to email subscribers who visit the particular post. This will help you gather your subscribers preferences which you can use later to offer them additional related information or products.
Modifying an Emdedded Form for ConvertKit
ConvertKit fully supports custom forms that are already integrated into the design of your site. To support a custom form you need to add a script tag with the ConvertKit script for each particular form and you will need some html knowledge to successfully modify the form. The steps to do so will vary depending on how your form is currently setup.
Create a ConvertKit form as discussed above but do not place it on your site with the plugin. Instead, you will need to compare the raw html provided by ConvertKit for the form with the custom form on your site.
The raw html is found under the “Embed” menu on the form. You will need to change the form action along with the input names and values to those expected by ConvertKit. You do not want to use the CSS styles provided by ConvertKit. Rather, carefully preserve the CSS classes your custom form uses so it will appear the same on your site as before.
If that makes sense go for it. You could test your code changes by embedding the form on a test page before you attempt to update your primary email capture form on your homepage.
If this sounds difficult, and it can be, contact your theme designer or technical consultant for assistance.
How to take advantage of our ConvertKit consulting?
Create a free trial account at ConvertKit with our affiliate link.
Contact us and let us know the following:
- Your website URL
- The number of subscribers currently on your list
- The email address you used to sign up at ConvertKit.
- Your current email list provider.
We will be in touch soon.
If you have any more questions about switching to or setting up ConvertKit, ask them below by leaving a comment.